Email Signatures
Set up the signature on the emails you and your team send, plus a separate one for automated emails like booking reminders
Email Signatures
Sign off properly without retyping your details every time.
- Two signatures: one for emails you and your team write, one for automated emails
- Build it in rich text or in HTML, with variable chips for your business and staff details
- Variables like your business name, phone and logo are filled in as the email goes out
- Remove or tweak the signature on a single send without changing the saved one
- Do nothing and you keep exactly the sign off you have now
A signature is the block that sits at the bottom of an outgoing email: your business name, phone, website and logo. On the emails you send yourself it can carry your own name and number too. You write it once in settings and Cooledge adds it as each email goes out, filling in the variables at that moment so the details are always current.
Signatures are set up on the portal. The mobile app can remove and re-add a signature on a send, but not edit one.
The Two Signatures
There are two, and they are used in different places.
| Signature | Used by |
|---|---|
| Email signature | Emails you and your team compose: quotes, invoices, purchase orders and job forms sent from the send screen, plus emails written in Messages |
| Automated email signature | Automated emails like booking reminders, plus any send with no human behind it |
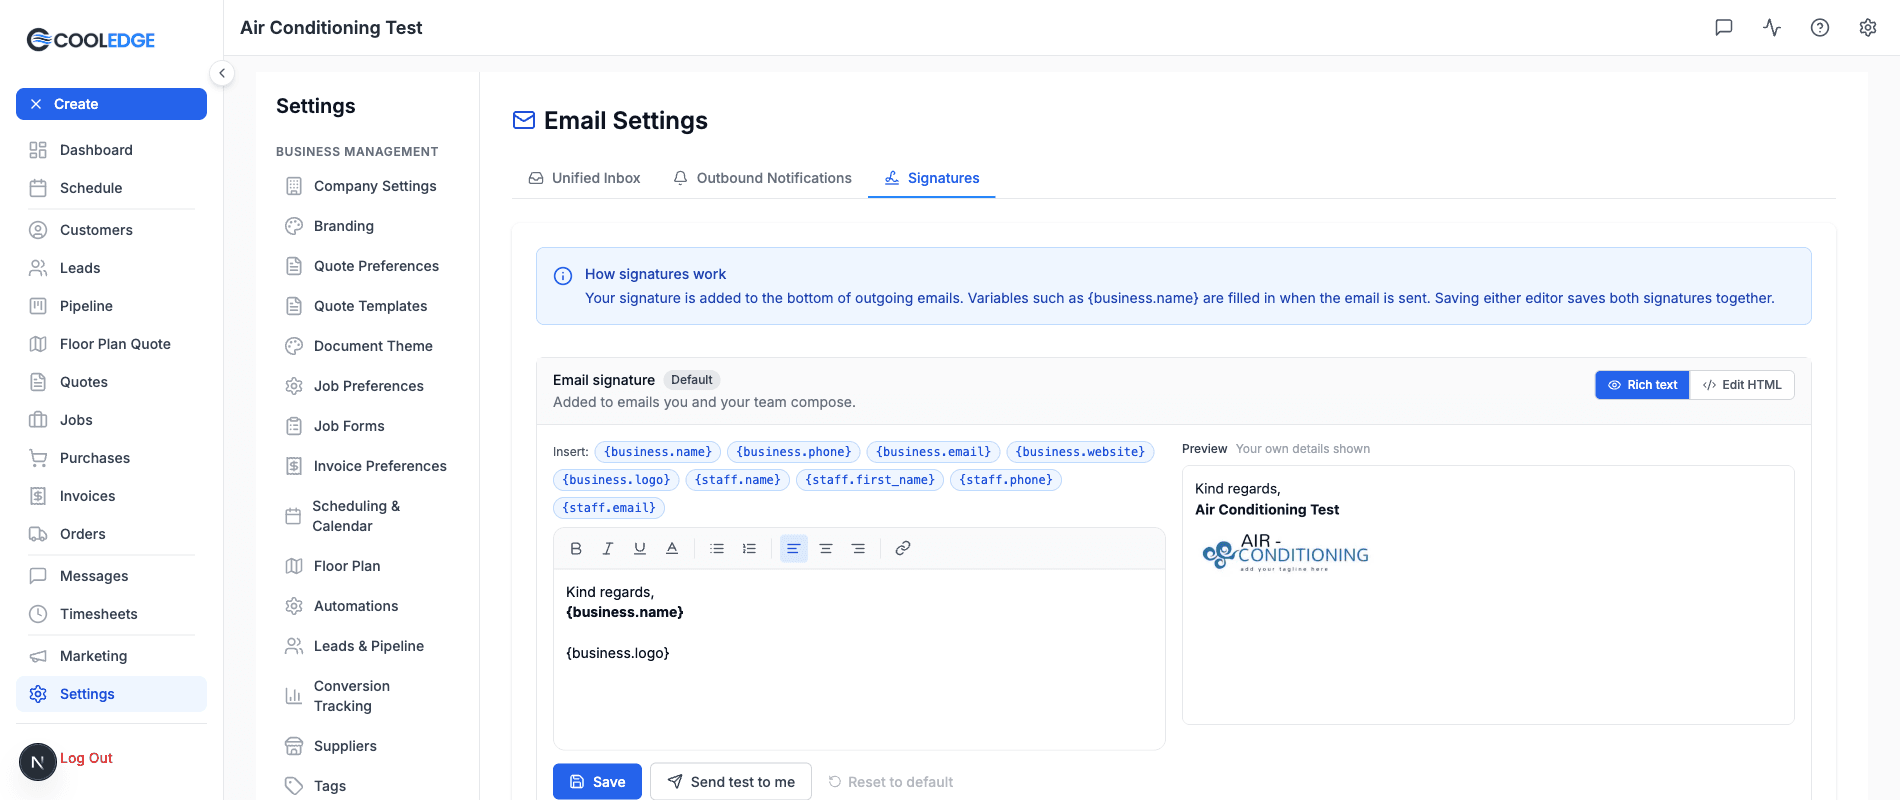
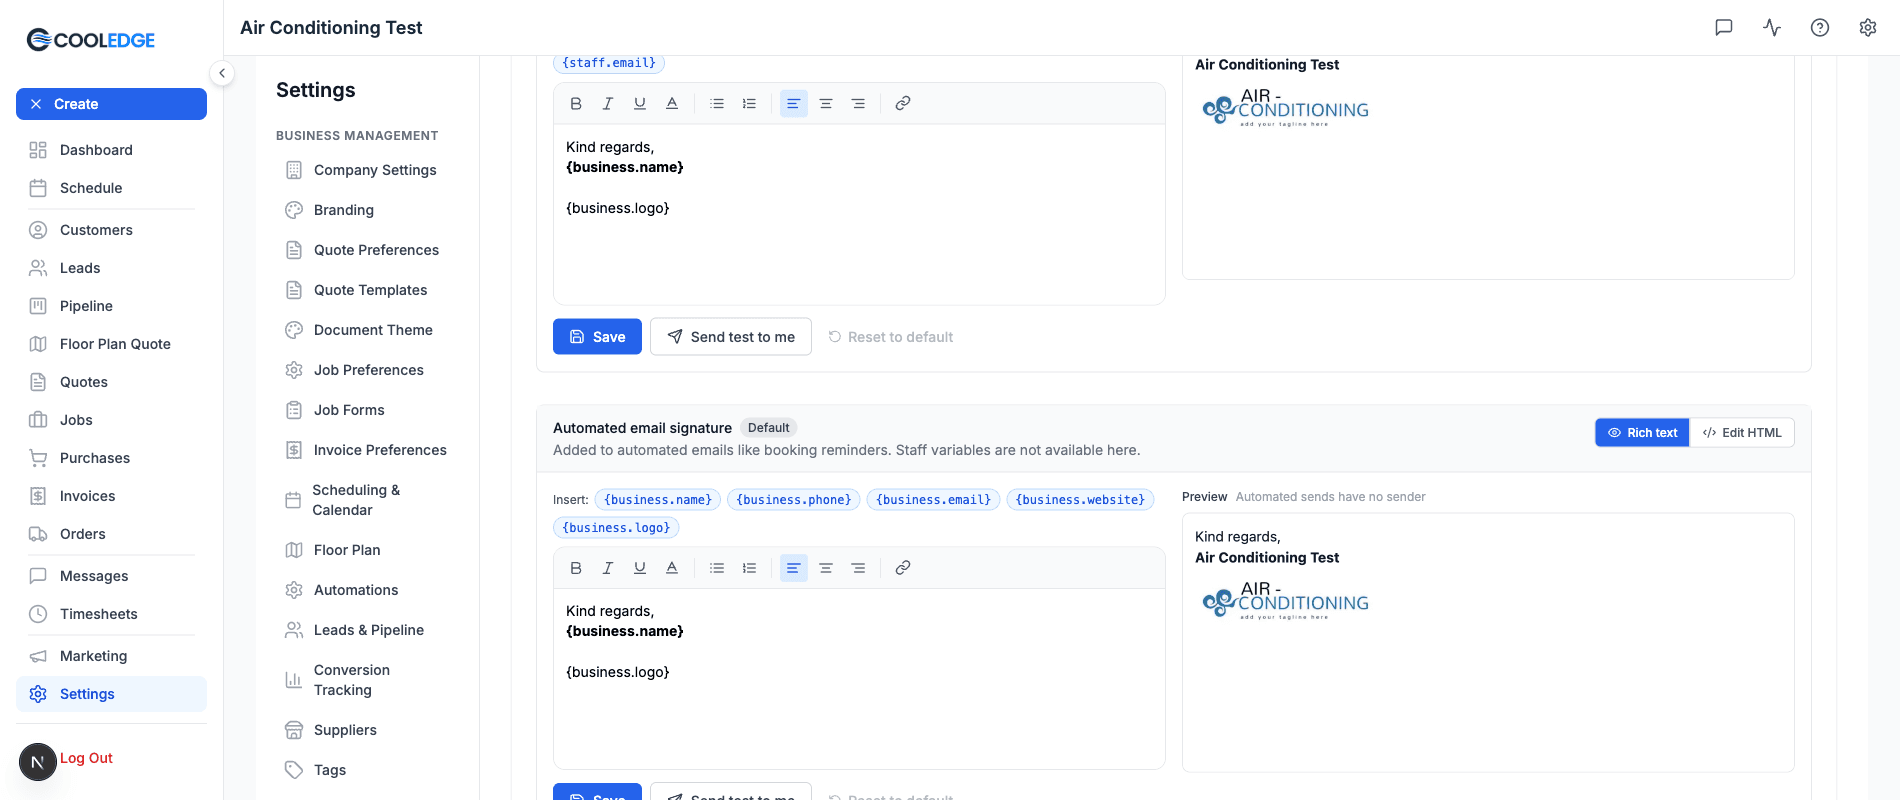
The helper text on each card says the same thing: Added to emails you and your team compose. and Added to automated emails like booking reminders. Staff variables are not available here.
The reason for the split is simple. When there is no identified sender, Cooledge uses the automated signature, so an automated email never signs off with a staff member's name and phone number. That is also why the staff variables are missing on the automated card, since there is no one to fill them in with.
Getting There
- Open Settings in the portal sidebar
- Go to Email Settings
- Open the Signatures tab, the third one beside Unified Inbox and Outbound Notifications
The tab opens with a short note explaining that your signature is added to the bottom of outgoing emails, that variables such as {business.name} are filled in when the email is sent and that saving either editor saves both signatures together.
Editing a Signature
Each card has a Rich text and an Edit HTML toggle. Rich text is the normal way in. Switch to Edit HTML if you want to paste in a signature your designer built or line something up precisely.
Under the editor sit the variable chips, prefixed Insert:. Click one and it drops into the editor at the cursor.
Email signature chips
{business.name} {business.phone} {business.email} {business.website} {business.logo} {staff.name} {staff.first_name} {staff.phone} {staff.email}
Automated email signature chips
{business.name} {business.phone} {business.email} {business.website} {business.logo}
The five business variables only. There are no staff variables on the automated signature, because an automated email has no sender.
To the right of each editor is a live preview. It is labelled Your own details shown on the email signature, since it fills the staff variables with your details, and Automated sends have no sender on the automated one.
When you are happy, click Save. Both cards save together in one action, so a change to one saves the other as it stands too, and you get a Signatures saved confirmation. A card you have never edited carries a grey Default badge.
Adding Your Logo
Use the {business.logo} chip and Cooledge drops in the logo from your branding settings.
If you would rather place an image yourself in the HTML editor, it must use a full https address, for example https://yoursite.com.au/logo.png. A file path off your computer will not work, since the image has to be reachable from the customer's inbox.
The Default Signature
Out of the box the signature is Kind regards, then your business name in bold, then your logo if you have one set.
If you never touch the Signatures tab, that is exactly what keeps going out. Nothing about your existing emails changes.
Send Test to Me
Send test to me emails the signature to your own address so you can see it in a real inbox, on your phone, in Outlook or wherever your customers read it.
Worth knowing:
- It sends what is on screen right now, not the last saved version, so you can test before you commit
- The subject is Test: Your email signature
- You can send five a minute
- It is never logged as a customer message, so your Messages history stays clean
Using a Signature on a Single Send
The signature shows up in the message body on the send screen, so you can see it before it goes.
On the portal, hover the signature block and two actions appear:
- Edit signature changes the signature on that one email only. Your saved signature is untouched
- Remove signature takes it off that email. An Add signature pill appears if you change your mind
On mobile, the email tab shows Signature attached with a Remove link, and a + Add signature pill to put it back. You cannot edit the signature text on mobile, so make wording changes on the portal.
Turning Signatures Off
Clear the editor and save. An empty signature means no signature at all, on every email that would otherwise carry one.
Reset to default puts the standard sign off back if you want to start again.
Where Signatures Appear
Signatures cover the emails you and your team send, plus booking reminders. That is:
- Quotes, invoices, purchase orders and job forms sent from the send screen
- Emails you write in Messages
- Booking reminder emails, which use the automated signature
These do not carry a signature:
- Quote follow up chasers
- Review request emails
- Marketing campaign sends
- Online booking confirmations
- Supplier order emails
- Invoices sent through the public API
SMS never carries a signature. Texts are capped at 425 characters, so the space is better spent on the message. If you want your business name in a text, put it in the SMS template.
Troubleshooting
Signatures cannot contain scripts, frames or embedded objects. Pasted HTML from a website or a signature generator often drags in a script tag, an iframe or an embed. Strip those out or rebuild the signature in the rich text editor.
Signatures cannot contain event handlers. Same cause. The HTML has something like an onclick attribute in it. Remove the handler and save again.
Signatures cannot contain javascript links. A link is pointing at a javascript address rather than a web address. Point it at a normal https link instead.
Images in signatures must use a full https address. Your logo or image is linked to a local file or an http address. Upload it somewhere public and use the full https address, or use the {business.logo} chip.
Staff variables are not available on automated emails, there is no sender. You have put a {staff.…} variable on the automated card. Swap it for a business variable, since there is nobody to fill a staff variable in with on an automated send.
The signature looks wrong in the customer's inbox. Use Send test to me and check it on your phone as well as your desktop. Email clients handle HTML differently, so keep the layout simple.
Related: Sending Quotes, Invoices and Other Documents · Message Templates · Booking Reminders
Need a hand? Email us at support@cooledge.com.au
Was this article helpful?
Let us know if you found this information useful.
Still need help? Contact support
In this article
Use your browser's search (Ctrl+F) to quickly find specific topics within this article.
Browse all help articles →Related Articles
Booking Reminders
Automated SMS and email reminders that fire before every scheduled visit. Filter by staff, category, or visit type, with quiet hours and custom templates.
Call Forwarding and Voicemail
Forward calls from your business number to a mobile or landline, set business hours and record your voicemail greeting
Call History
See every call to your business number, who called, what happened and any voicemail they left